This is not so much an after-action report as a compilation of reports sent in by the game masters. It serves to give a sense of the battles, however. The full schedule of events can be found here.
All told, we had players sign up for around 40 seats in a dozen different games. (It should be noted that most games were fairly small, as remote play is less-suited to having large numbers of players than in-person.) Games were variously conducted using Discord and Tabletop Simulator, Skype, and Zoom, based on the game master's preference.
Our thanks to everyone who helped make this event possible, and especially the game masters. Due to them, everything seems to have come together without a hitch, which means that it was a great success, all things considered. Plans are already being laid for another early in the new year!
[Note: The scenario for the battle can be found here.]
Folks:
Thanks for the game - I had a lot of fun running it! I was pretty sure this was going to end up being a massive slaughter of the Liegeois (like it was historically) but it ended up being quite close: Liegeois lost 11 points (exactly their break point) while the Burgundians had lost 10 of 12 points, including the capture of the Lord of Contay (the advisor who told Charles to punish the rebels in the first place). Poetic justice!
Well played by all.
Here are some shots of the massive final scrum:
From the Burgundian side, near the southern end...

The northern end...

And from the Liegeois side:

Cheers,
Arofan
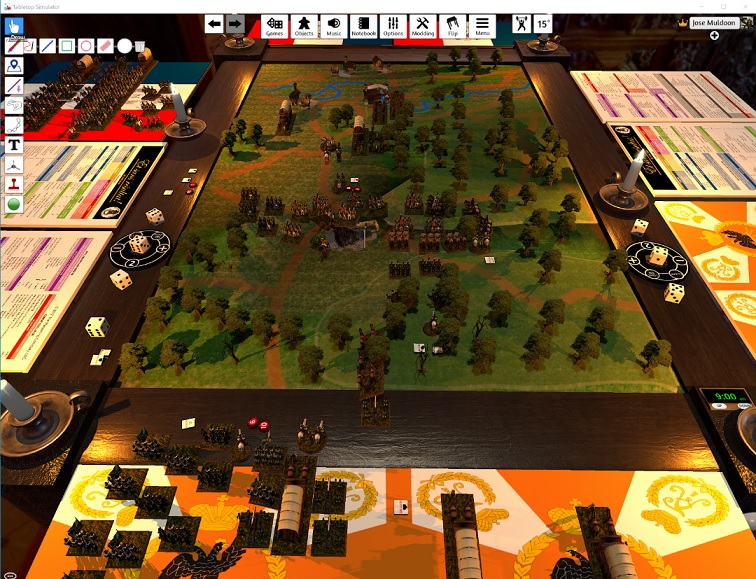
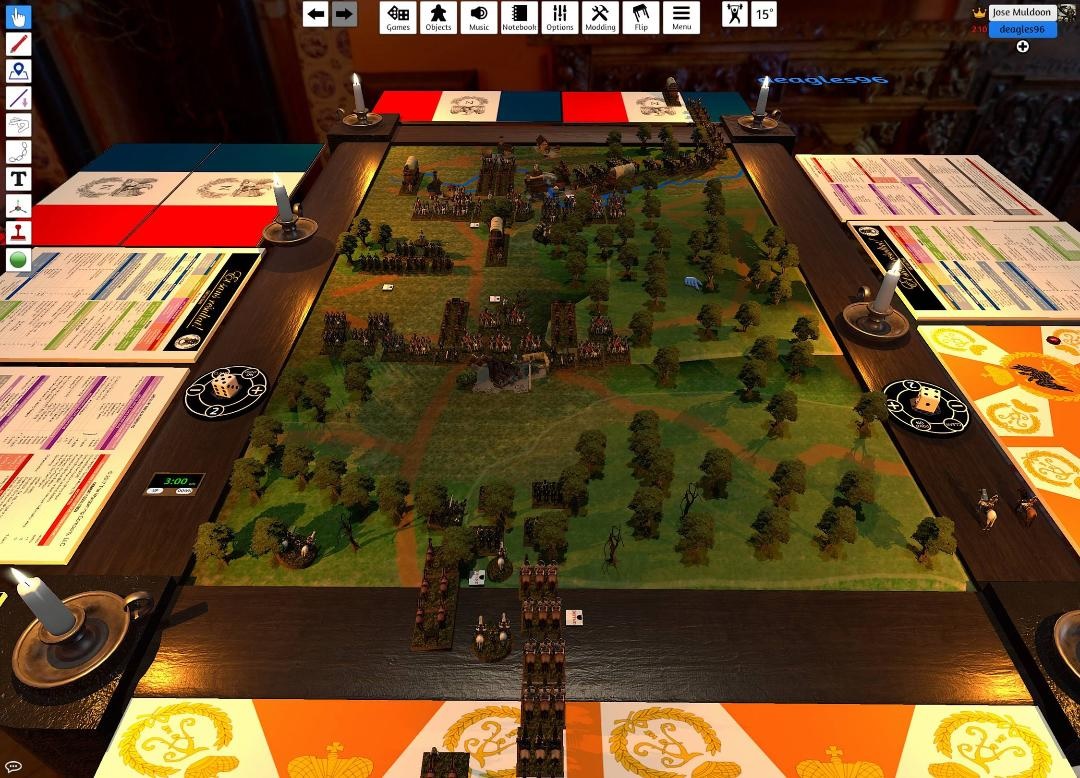
I had two players for Yakubovo. This is a compact battlefield and the two sides get into it right away. The Russians were very aggressive and pushed their guns right into the French lines. The French countered by leaving their positions, to try to remove the guns from the battlefield. In the picture below, you can see the Russian light cavalry waiting in the woods to the left and the French light cavalry in reserve near the top center of the picture.

There was a LOT of dice rolling. The firepower advantage is on the Russian side but the guns were at risk. The light horse battery on the Russian right managed to weather the French assault but the left brigade did not fair as well. The Russian cavalry was committed but did not make contact with the enemy as there were too many troops in the middle of the way to push into the fray.
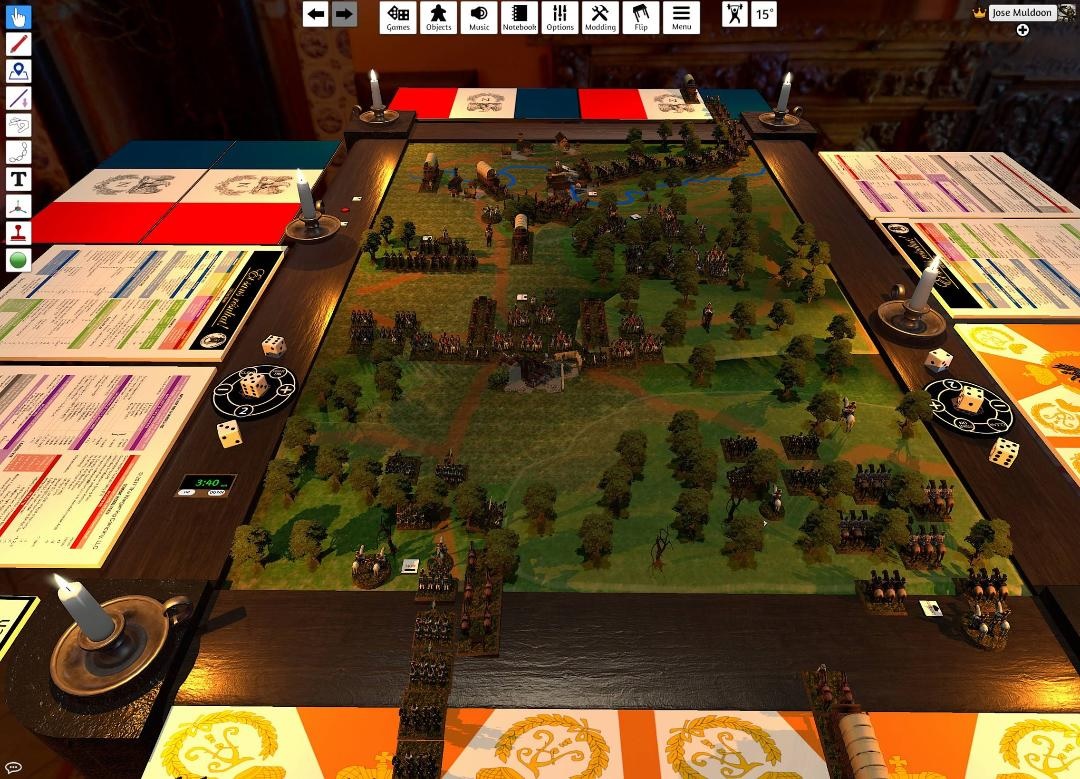
The French cavalry advanced to the right of the French formation and waited. The infantry battle pushed back and forth, with the French right falling back in disorder. The French light cavalry advanced at this point, making contact with the Russian light cavalry and tired infantry on the Russian left. The horsemen of both sides battled in the trees, Unfortunately, the Russian commander had led with his best scouts, the Don Cossacks, but was caught in column. The French pressed their attack, scattering the Cossacks and the supporting dragoons driving into the marching troopers in the column. The stalwart Russian infantry held back the French cavalry in the center, but both the infantry and the cavalry were spent. The French cavalry rode back to camp, a job well done.

The Russian right is still a viable force. The Russian left is tired, but will recover to about 1/2 strength in the next hour. All of the French brigades initially deployed are beaten but will recover in the next hour to about 1/2 strength. French infantry is marching on the road to take up positions and fight the Russians for the battlefield. All of the cavalry on both sides as withdrawn.
This was a fun introductory game and I was happy to introduce the players to a new rule system.
Regards,
Todd
A PDF of the scenario is available here.
John writes:
I believe it went well and both Peter (Canadiens) and Patrick (British) enjoyed themselves. The French attacked in force but the British Rangers and Infantry were able to put up significant firepower and drove back the Canadien forces after a 2 and half hour battle.
[Images below are in no particular order - but that terrain is gorgeous! - Editor]


Will ran this scenario - based on the historical battle - using 20mm miniatures and the 4' x 4' rotating table he built. (This is a pretty cool piece of kit, because you can "pan" the camera by smoothly moving the table. Much better than the usual "Blair Witch" effect some of us treat our gamers to!)
Will writes:
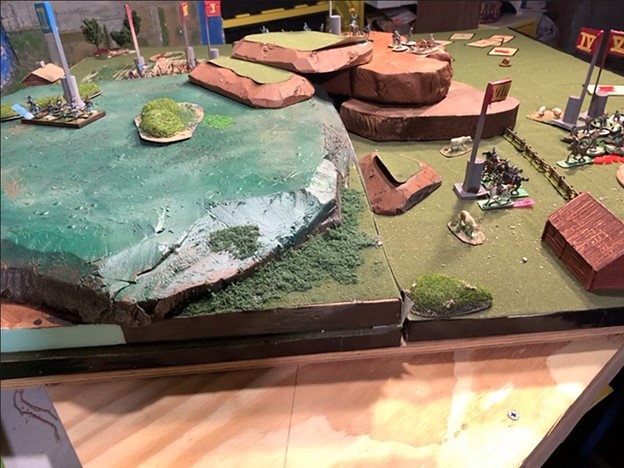
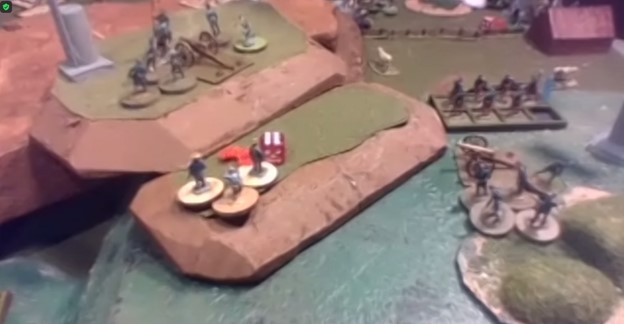
The scenario placed our two Confederate commanders racing from opposite flanks to capture a Union Artillery Battery placed high on the bluff. While our sole Union player out number almost two to one attempted to source boats to get his troops across the river and rescue the guns.
Victory conditions were who had the most of the three guns at the end - Confederate Commanders captured or Union Commander brought back safely across the river - wins.
View of the Battery from the Confederate Left/Deployment Point.

On the Confederate right, Dawson was slowed by troops taking time for breakfast. Also known as not getting cards, but he used the surplus of command flags to get his line going. Slowed by the muddy rutabaga fields, he started to climb his troops up the bluffs to intercept the escaping Union guns. While he gloriously destroyed Union skirmishers sent to slow him with a single crashing volley and came close to intercepting the Artillery�s escape route, he failed to capture a gun.
Dawson�s troops moving up the bluffs.

On the left, Patrick went with a different approach. Blessed with better cards, he sent his cavalry across the pattie laden cow field towards the bluffs and paid a price for it. The Union commander turned a battery and fired instead of running. His troopers were blasted with canister shot from the side. He then used his overwhelming numbers to pour musket fire on the cannons. He was able to drive a group of artillerists from their post, effectively leaving a gun in Confederate territory for Patricks flank to later capture.
The Confederate left using musket fire.

Bill, our Union commander, was able to get control of the boats and get some units of Union skirmishers up on the bluffs to protect the cannons from the escape route. His bold early move to turn a gun and fight taught the Confederate Cavalry a lesson, but the difficulty of lowering the cannons over the steep bluffs cost him needed time, leaving a second gun crew still high on the bluffs. He was able to successfully get one gun closer to the boats for rescue, but when we ended his artillerists were still rolling the gun�s carriage to safety.
Yankee skirmishers hurry up from the boats to help, while a Union gun crew prepares to turn and blast the Rebel Cavalry.
Final Union gun placement. Close, but not close enough.
The scenario is available here.
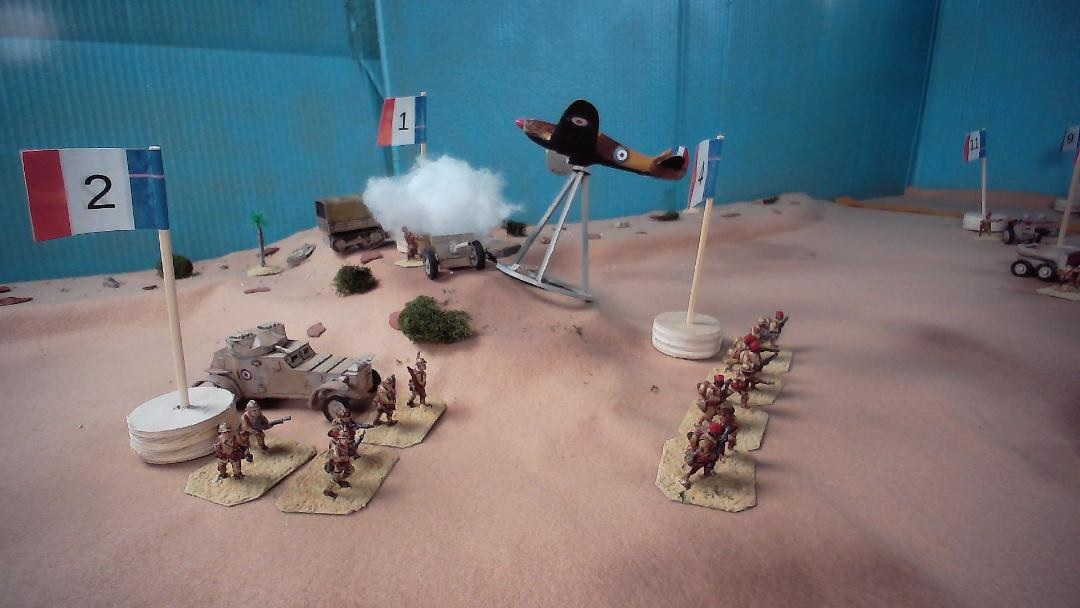
The Operation Compass game was a Western Desert refight from early 1941, British counter-attacking against Italians. They had to get around an Italian defensive "box" to capture the Italian supply dump. Half of the Italian garrison of the town surrendered on the last game turn, with the remaining half giving the Italians an extremely technical win. It could not have been closer!
The British advance on the Italian box...

and drive south around the position.

The Italians begin their "Thermopylae" action:

The British mediums get singled out for a pasting:

The last Italian Solothurn gunner holds the village as the Aussies storm in with their Wolseley helmets and Lewes guns...

and the Fascist pig watches tanks burning in the desert as the sun goes down.

Todd writes:
I had two players, playing the French in shifts. I ran the Russian assault on the French. Lots of artillery fire, turn after turn with little effect finally began to wear on Legrand's division. The Russians moved forward to clear the French from Yakubovo castle.

I should have known something was up, when my player asked, "Isn't there an order conversion before Combat?" "Yes," I answered and a division of French light cavalry desended upon the beat up Russian division advancing on the left. The French cavalry left the field victorious, nearly destroying Berg's division. This cleaned out the Russian left. On the right, the Russian light cavalry set up Legrand's division for a similar treatment.
The final aftermath left the Russians in possession of the field, but with limited resources to sustain an advance. The game lasted 6 hours in game time and about 3.5 hours of real time.

Todd writes:
This evening we ran the same Yakubovo scenario from Friday night. This scenario has the Russians attacking from the wood line against a hastily assembled force of light infantry and light cavalry. I had two players Joe and Doug, both new players, although Doug had played the scenario on Friday night, so he had a bit of an idea about what he wanted to do. Joe showed up a bit late and took over my command of the Russians. The game usually opens the same way, with a Russian bombardment of Yakubovo castle.
Doug "The Wiley" had seen this coming and took up positions just outside of the town walls, requiring the Russian commanders to push their guns further up. The Russian infantry advanced as well. The expected barrage was delayed by a turn, but not stopped. However, The Wiley took this opportunity to move his skirmish screen back near the castle and engage the gunners in a running gun fight. Unfortunately, the weight of shot coming down range was decidedly in favor of the Russians. My players did not have available copies of Tabletop Simulator but watched from my Discord stream. This had me rolling all of the dice and I had a run of luck for Russian morale checks. I was only one time not in the 9+ range. it was a bad day in Russia.
Joe "Forward March" joined us just as the running gun duels were heating up. We took a few minutes to get him briefed on the battle plan, the rules, and generally get him integrated into being the best Russian commander he could be. (In Czarist Russia that could be a high bar or a low bar, depending on your family connections.) So as the Russians advanced on the castle, the first French brigade got pretty shot up. Standing in the woods with muskets against 24 guns at 450 yards sounds like a pretty rotten place to be, especially when your side forgot to bring your cannons!
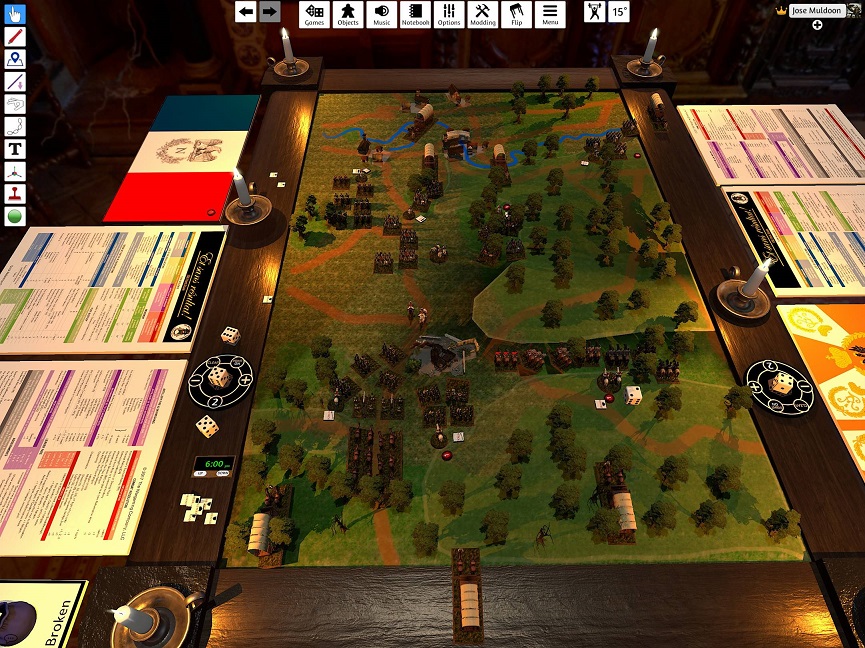
The first photo is at 6pm. The Russians have routed the infantry on the French right and who are now in the left in the woods in poor order. The remaining brigade is anticipating the next phase. This brigade is warmed up but nowhere near spent. The Russians are going to have to mask their guns to attack the castle. This is going to have to be done with the bayonet. Forward March does not disappoint, sending the finest Russian infantry to assault the castle walls.

Both Russian brigades hurled themselves at the castle walls. They pushed the French around but were eventually forced out of the castle. The French had a toehold in the castle but lost nearly all of their infantry in holding the fort. No more tricks, The Wiley was forced to withdraw from the castle as his men had no heart to try another fight with the Russian infantry. The Wiley watched as his men fell back into the woods while he shouted orders to his lieutenants that they were going the wrong way! As you can see the cavalry on both sides peering into the juicy infantry ready for the scythe. Both the Russians and the French light cavalry charged into their respective targets. The French cheered on by The Wiley. Forward March was rendered light headed by a musket ball to the side of the head, but his aides managed to get the Russian light cavalry after the infantry in the woods.
The aftermath was terrible. The French cavalry came in waves, one after another, fell back, and came again. The Jagers fell back before the onslaught but fought for every inch of Russian soil. The French cavalry was sent packing without achieving their objective. The Russians on the other flank found a different result, coming in between the baggage and the battle waves. The French infantry broke and ran through the forest for their lives.

In game time, about 20 minutes had passed, it was a very exciting time. The Russians have taken the castle although not occupied it. The only French formation Maison's brigade in the middle of the table. The Russian cavalry is nearly spent but has enough for one last forray. The Russian infantry is in very good shape. The French commander was forced to concede and head for Saint Petersburg for reinforcements.
Dave writes:
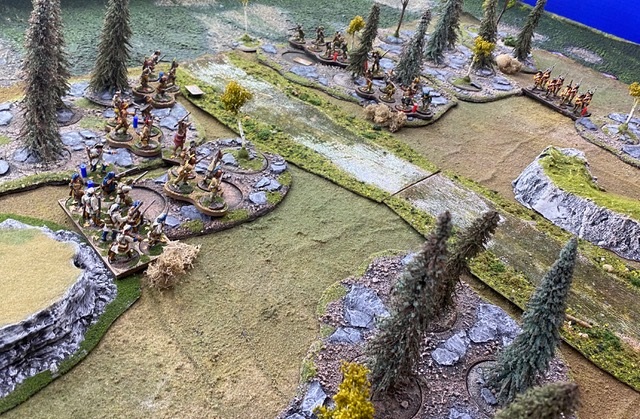
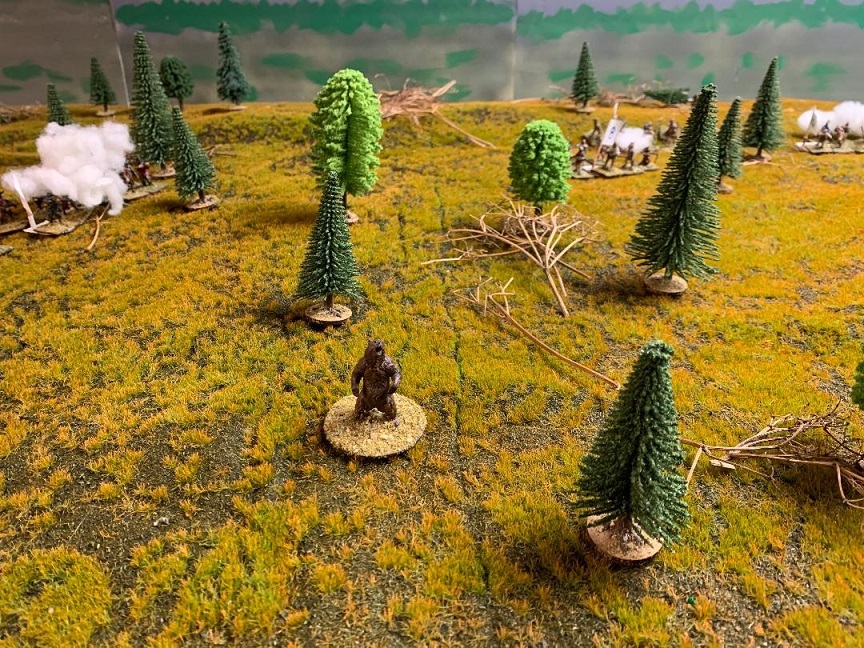
On March 26, 1676 during King Philip�s War, Captain Michael Pierce led approximately 60 Plymouth Colony colonial troops and 20 Wampanoag Christian Indians in pursuit of Narragansett Indians who had burned several Rhode Island towns and attacked Plymouth, Mass. as part of King Philip�s War. Pierce�s troops caught up with the Narragansett Indians but were ambushed. He had sent word to Providence that he was in need of assistance. Historically Capt. Edmunds waited until after Services on Sunday to muster his men and aid Capt. Pierce, only to reach Pierce in time to bury the dead. The history behind Nine Men's Misery is varied, the accepted story is that some of Pierces men got separated and were ambushed and caught. These nine men were tortured and killed by the Narragansett.
In this scenario, Edmunds musters his men right away and sends an advance scout of nine men (one of the variants of the story). The nine, get ambushed and hold up against and behind an outcropping of rocks, fighting to the last man. Edmund's men arrive (historical story is that they didn't make it on time), but are cut off from the nine... can they save them before they are wiped to the last man?
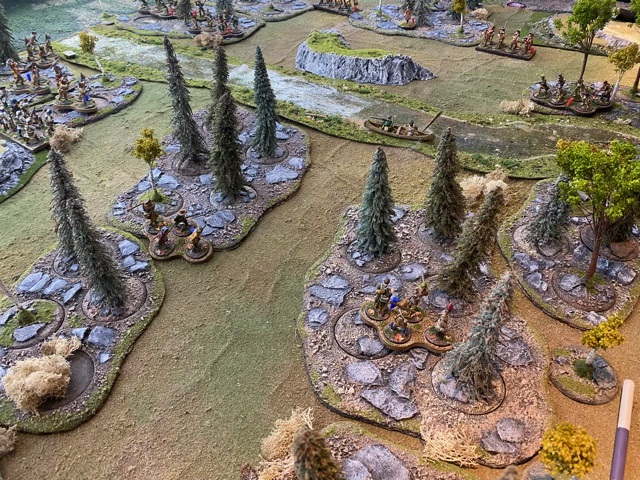
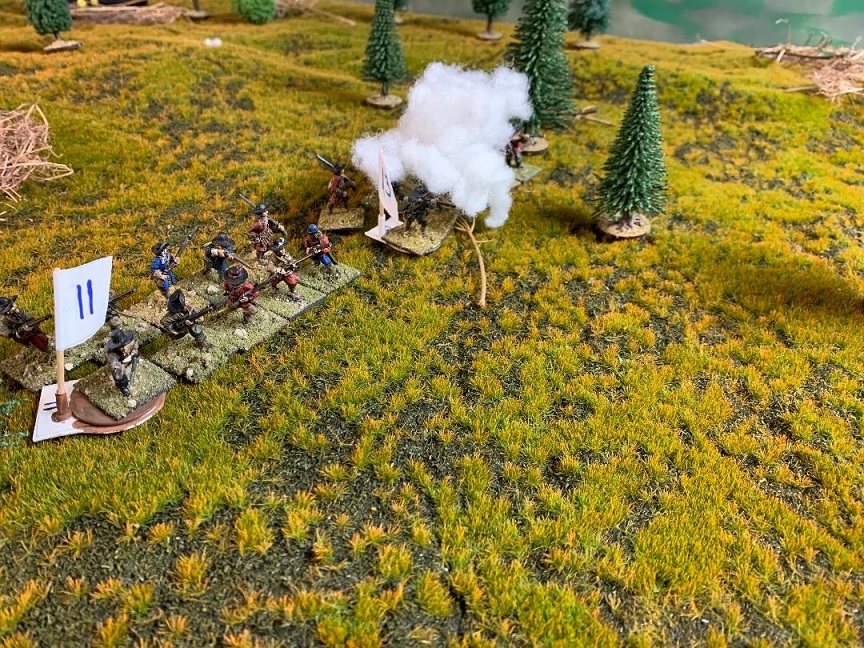
The game began with an advance scout of nine veteran English soldiers (broken up into two units of 4 and 5 men) getting ambushed and falling back into a rock outcropping, where they fortified themselves for the duration of the game. 40 English soldiers were moving in from the south in formation, until they came to a rise in the land and the natives opened up on them. Two 10 man units fell back slightly and fortified themselves behind some brush and trees. Here they laid in wait. The right flank began to move North on the east side of the board towards the rock outcropping, where they were met with heavy fire from the natives. Some bloody shooting ensued, losses were had on both sides, then the natives turned their attention back to the men in the outcropping and began firing on them. At this point the left flank decided to begin moving forward to aid the men in the outcropping. But before they were able to move, the native players played "Bear Attack!" and a bear was placed 6" away from that flank. At this point if they didn't move away the bear would attack the closest unti at the end of the turn. So plans changed. However because they were at full strength they were able to fight off the bear and it only slowed them down.
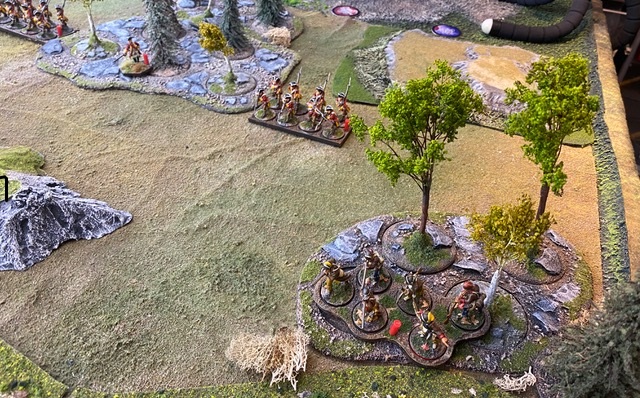
The right flank was making headway moving up the east side of the board and almost made it to the outcropping when the natives played another bear attack (all in all there were three bear attacks, with 3 bears on the board at the same time). Between native fire and the bear attacks they were able to wipe out both of the units on their way to assist the men in the outcropping. At this point the natives looked like they might have a chance to rule the day.... then the turn ended and we realized that the natives really had taken heavy casualties and were below 50% of their overall force...so they must begin a retreat away from the enemy. I had set the rules that they had to move back at least 1" per turn, could not advance, could not attack in melee (but could defend), and they could shoot. So the natives began their retreat moving back an inch at a time, taking shots at the English as they went.
Time was running out and it was decided that it was a draw, with a probable win by the English, as the natives would have to get extremely lucky to take out 17 of the 20 men at long range before they made the outcropping. As was mused at the end of the game, it was "nature" that won the day.
Overall English losses:
6 veteran troops in the outcropping
20 English militia
Overall Natives losses:
35 warriors
All in all, a good game.


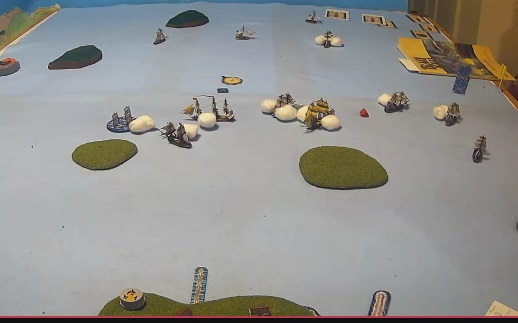
Adam writes:
No AAR yet but all six Privateers managed to escape... Some in very bad shape but all escaped. Two royal Navy cutters were lost. Bob Rioux managed to escape with his prize - a 32 Gun Frigate.
He has subsequently posted a full AAR on his blog, which you can find here.


This was a coop-play game, with players taking the part of the British and French against the attacking Germans at the very start of WWI, before trench warfare set in. The Allies held their position with elan, killing many times their number of the enemy, and only losing a few of their own soldiers.
The scenario is available here.
Arofan writes:
Folks:
Thanks for the game! That was a bit of a walk-over for the Allies, but just wait until next time! :-)
Here are a few quick pictures:
The overall table view:

And the Old Contemptibles defending the hedge:

Reservists about to get machine-gunned out of action:

The French cavalry's moment of glory, capturing the somewhat-obsolete M73 Krupp gun:

And the Irish Fusilier's moment of ignominy, failing to reach the farmhouse full of Huns with their charge:

Thanks again for the game!
Cheers,
Arofan
Alex writes:
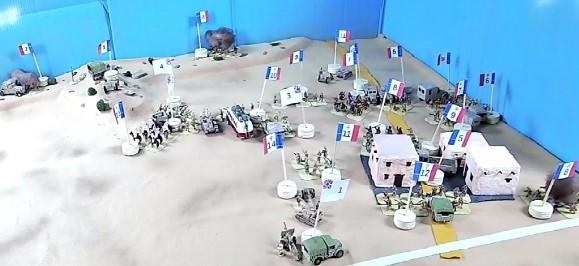
The game represented a major battle in the Allied campaign to capture the French colonies in the Middle East in 1941. Three columns of allied troops were converging on Damascus, the only major port in the region. Vichy forces, after falling back from the frontier, had taken a strong defensive position on a ridge behind the village of Kissoue. The objective for the Vichy army is to break half or more of the Allied forces at the battle. The Allies can win by either breaking half or more of the Vichy units, or by getting at least 1/3 of their own forces off the board near the Damascus Road to join the other columns of Allied forces for the attack on Damascus.
The Vichy players deployed with part of their forces on the eastern part of the ridge along the north edge of the table. A battalion of Goumiers held an advanced position in the village of Kissoue, with two cavalry regiments and the Syrian artillery between the village and ridge. They held two battalions of Foreign Legion, one of infantry with some WWI armored cars, and one battalion of obsolete tanks in reserve. Paul provided a nice map of their deployments before the game.

The Allied players surveyed the situation, and opted to put all of their forces into a massive attack on the village, with the intent of breaking through quickly and exiting the north edge of the board on the Damascus Road. Given the depth of the Vichy defense along their intended path, that did seem a bit optimistic.
The Allies sent several battalions of infantry, including the Pacific Colonies Battalion, a regiment of Senegalese, and their own Goumiers to attack the village, while French and British units swarmed around the flanks. At first, things looked good for the Allies, with their Foreign Legion battalion, plus two of French motorized infantry and some marines, breaking around the eastern flank into the space behind the Kissoue, while the 5th Indian Brigade, some in universal carriers, backed up by an assortment of French colonial forces swept around the western flank of the town.

This is when the sound decision to keep the Foreign Legion and tanks in reserve paid off for the Vichy army. A swift counter attack against the Free French on the east edge of the board stopped them cold for the rest of the game, while the French and Circassian cavalry, with supporting fire from heavy artillery on the hill, stalled the western flanking force.
As the sun rose to full brightness over the battlefield, both side unleashed their air forces. The Vichy attack struck the Free French Foreign Legion, taking much of their offensive punch away. Then the RAF struck the Vichy heavy artillery on the hill, largely sapping their strength. Each squadron had done their jobs well.


Despite being desperately outnumbered, the Vichy Goumiers held on tenaciously in Kissoue. As the battles on the flanks sea-sawed, they took on three times their number of Allied troops, and refused to budge. The Vichy tanks tried to push back the Free French on the east flank, but excellent anti tank rifle fire from the motor infantry battalions stopped the mostly WWI surplus tanks in their tracks. The WWI surplus French 75s in both armies hammered hapless infantry in the open ground, and casualties mounted on both sides. Units began to break under the continuing stress of combat, and many Frenchmen died at the hands of their countrymen on the wasteland of the Syrian desert.
Finally, the Allies gave up on Kissoue, leaving their Senegalese to keep the Goumiers in the village committed for the rest of the game, while the rest of the Allied forces joined the western flanking attack. The forces added began to tell on the small number of Vichy units available to stop them.

The Vichy 3rd Motorized Infantry and their regiment of Senegalese tried their best to hold the flank, while a battalion of infantry with some WWI surplus armored cars rushed to their aid.

Sadly, the Laffly/White armored cars were no match for the Allied artillery, while Spahi cavalry en route to attack the heavy artillery on the hill, dismounted to fire, and caused heavy losses on the infantrymen. The Pacific Colonies Battalion, with their liberated ISOBLOC city bus as transport, gained fame among the players for their "Party Bus", with many jokes about the surfboards loaded inside and the barbecue grill in tow behind. The Vichy Senegalese Tirailleurs were not so amused when the Fijians in French service send them packing, creating a large hole where a defensive line once stood.


At this point, sadly a second crash of ancient software running on an ancient computer ended the game. We had already played 1 1/2 hours over our scheduled time, and the players (and GM) were as fatigued as their troops. I called it an Allied victory, because it was likely that they would get enough units through the gap to win by exiting the north edge of the table with the required number of units. The game was fought skillfully by all players, and it was still conceivable that the remaining Vichy forces might have plugged the gap if we had continued.
I want to thank Lars Sather (my gaming buddy since 1973), Will Hunter, Paul Lawson, and Dawson Cook for taking part in a game I put a lot of effort into developing. Thanks also to the several designers on Thingiverse for their 3D designs for my printer of the odd vehicles required for these improbable armies. Also thanks to Arofan Gregory for designing the Active Armor computer assisted game system (updated version to run on handheld devices coming in 2021!). That excellent game system is the only reason I play any WWII games. Without all of you, I couldn't have put this game together.
The second time Todd ran this one, he had The Wargaming Company's David Enteness drop in - the game designer. How cool is that?
Todd writes:
Napoleon sent Marshal Oudiot and the II Corps to take Saint Petersburg, effectively the second Russian capital. Barclay de Tolly ordered the I Infantry Corps under Wittgenstein to pursue the threat to St. Petersburg. Marshal Oudinot dispatched elements of the 6th Division under Legrand to blunt the Russian advance while he changed directions. Late on the 30th of July, 1812, elements of the 6th Division clashed with the Russian I Infantry Corps advanced guard and retained control of Yakubovo castle and the surround areas. The battle opens with the 6th Division reinforced by its artillery and light cavalry facing the Russian advanced guard as the remainder of the I Infantry Corps marches onto the battlefield.
Wittengstein begins to position his troops to the left and the advanced guard on the right. Legrand took up the position between the small hill and the woods. The Russians continue to arrive from the west, filling in and deploying under the French guns.
Oudinot and Wittgenstein maneuver for advantage. Oudinot sensing the threat to his left moves the 8th Division under Verdier to the wood line to challenge the Russian advance in this sector. Wittengstein deploys the 5th Infantry Divsion on this left and the 14th Infantry Division in the center, commanded by Generals Berg and Kakhoffski respectively. The Russians deployed into the woods for nearly an hour. Meanwhile Legrand directed his gunners to target the infantry over and over again. Eventually disordering the 5th Division as it was trying to transition to a fighting formation. The disorder was so bad that the artillery commander could not locate his guns and left them limbered and idle.
The grenadiers of the 14th Infantry Division performed a similar evolution, moving from column into line of battle. The French kept up minor fire into the woods as the grenadiers showed themselves. A stray ball hit a tree spraying splinters into General Kakhoffski arm. While not a fatal wound, the grenadiers of the 14th Infantry leaned on the stalwart leadership of the stoic Pavlovsk Grenadiers, maintaining order, while the general received medical attention.
General Kulnev and the advanced guard redeployed the only artillery battery that the Russians were able to deploy. This was necessary to reinforce the Russian right which was now threatened by the much larger 8th Division. With distances much reduced, the Russian guns did not appreciably contribute fire to either Legrand nor Verdier, but that did not last long.
Verdier recognized his tactical advantage. He ordered forward a heavy skirmish screen and both batteries pushed to within canister range. Brigade Dennissiev of the advanced guard took comfort in the twelve guns sent to their aid by General Kulnev, but there were a lot of Frenchmen in those woods. Many of the Jagers could be seen looking to their left, waiting for the first glimpse of the 14th Division. The sounds of troops marching to their left was evident from the French cannon fire in that direction but many feared that they would arrive too late to come to their aid.
On the French left, Verdier continued to aggressively engage the Russian infantry to his front. The Russian battery continued to be a tipping point keeping the Russian division in the battle even with the French numerical advantage. After exchanging fire with the Russian infantry and artillery, the French battery commander decided to deploy his guns to the rear. This was about the time that the Russian grenadiers of the 14th Division joined up with the Jagers of the advanced guard.
On the French right, Legrand enjoyed a few minutes of peace. The Russians pulled back to reorganize. Legrand took time to redress his lines and send an aide to check on the wounded. On the Russian side of the lines, Wittenstein sent an aide to bring up the guns of the reserve. He then found the most senior artillery officer of the 5th handed him a musket and assigned him to the Mogilev Infantry. The remaining staff promised to get their guns on the move.
The 5th Division was again on the move, lead this time by 24 twelve-pound guns of the formation artillery reserve. The reserve artillery unlimbered twelve six-pound and twelve more of the big guns. Legrand was suddenly facing the assets of the Russian corps. The Russian guns barked and the grenadiers of the 14th charged home contacting both Legrand and Verdier. Huge holes opened up in the French lines. These were quickly filled by the troops behind witnessing the slaughter but never failing in their duty as Frenchmen. The French six-pounders on Legrand's right meekly responded, carrying far less weight than their Russian counterparts. However, one of the balls bounced close to General Berg, breaking a tree branch and sending the heavy canopy directly onto the general's horse. While the animal was not seriously hurt, General Berg was knocked senseless. The artillery officers fearing for their guns, withdrew two full batteries in the face of the enemy. Unfortunately, the weight of fire forced the French artillery to withdraw as well.
Both French divisions experienced a tough fight from the 14th. While there were positive tactical results, beating one grenadier battalion was rendered moot by the adjacent battalion winning. One Russian battalion pushed from Legrand into Verdier rolling the line infantry in front of it. The French infantry bent but did not break.
We had to call the game after 3.5 hours. It was a lot of fun. Here's a final screenshot to look forward to the next convention:
